CRIMPING TECHNIQUE
Proper crimping is the key to a long-lasting bracelet or necklace design, as well as an easy method for finishing Beadalon stringing wire. Beadalon offers a variety of Crimp Bead and Crimp Tube sizes and finishes to accomodate your specific needs. Fasten Beadalon Crimp Beads and Crimp Tubes securely with the easy-to-use Beadalon Crimper Tool.
| • Step-by-Step Instructions • |
 |
1. Select the appropriate flexibility, diameter, and color of Beadalon wire. Choose the largest diameter possible based on the size of the holes in the beads and findings. |
| |
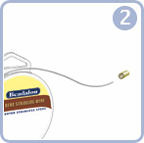 |
2. Select either crimp beads or crimp tubes - then choose plating color, silver or gold. Match suggested crimp size as indicated on the wire package. (Illustration shows a crimp tube.)
| Diam. |
Fits
EZ-Crimp |
Crimp Bead |
Crimp Tube |
Fits
Scrimp |
| .010 in. |
.25mm |
yes |
0, 1 |
1 |
yes |
| .012 in. |
.30mm |
yes |
0, 1 |
1 |
yes |
| .013 in. |
.33mm |
yes |
0, 1 |
1 |
yes |
| .015 in. |
.38mm |
yes |
1 |
2 |
yes |
| .018 in. |
.46mm |
yes |
1 |
2 |
yes |
| .020 in. |
.51mm |
yes |
1 |
2 |
yes |
| .021 in. |
.53mm |
yes |
1, 2 |
2 |
yes |
| .024 in. |
.61mm |
no |
2, 3 |
2, 3 |
no |
|
| |
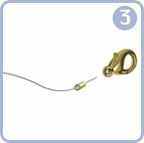 |
3. Insert the Beadalon wire into the crimp. |
| |
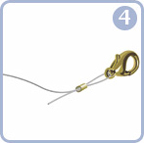 |
4. Thread the wire through the clasp and back through the crimp. |
| |
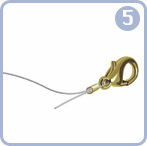 |
5. Slide the crimp up close to the clasp, leaving enough room to allow the clasp to move freely. |
| |
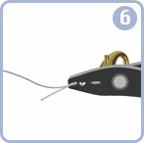 |
6. Place the crimp in the OUTER slot of the crimp tool and make one firm compression. This will shape the crimp into an oval. Be sure to keep the wires parallel. |
| |
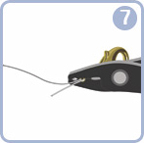 |
7. Now, place the crimp in the INNER slot of the crimp tool and make one firm compression. The shape of the crimp should now resemble a crescent moon |
| |
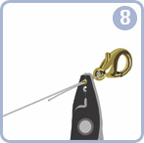 |
8. Next, place the crimp in the OUTER slot of the tool at a 90° angle, and make another firm compression. This rounds the crescent into a round bead again. |
| |
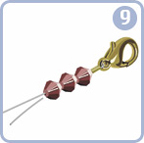 |
9. String 1 to 3 beads, then trim the excess wire with the Beadalon Nipper Tool. |
| |
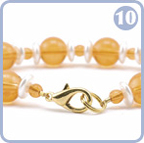 |
10. String the rest of your design. Repeat steps 3 - 8 for crimping the clasp to the opposite end to complete the design. |
|
See also: Resource Center | Crimpers | Tools | Tips and Techniques